How to Create a Collection and Define Its Schema

What Collections Actually Are
A collection is Pixelesq's built-in content management system (CMS). You define a schema once (the fields each entry will have), then create unlimited entries that follow that schema. Think of a collection as a database table with a structured form, and entries as rows in that table.
Collections are how you build:
Blogs - each post is an entry in a Blog collection
Portfolios and case studies - each project is an entry
Team pages - each team member is an entry
Product catalogs - each product is an entry
Event listings, job postings, FAQs, testimonials - each is an entry
Without collections, you would duplicate pages manually and update them one by one. With collections, you update the schema or template once and every entry updates automatically.
The hasPages Decision You Cannot Undo
When creating a collection, you choose whether it has pages. This decision is permanent.
hasPages = true: Each entry automatically becomes a public page with its own URL. Use this for blogs, portfolios, team pages, products, anything where visitors need a dedicated page per entry.
hasPages = false: Entries are data only, never become pages. Use this for content that appears inside other pages (like testimonials embedded in a landing page, or FAQs rendered on a help page).
You cannot switch between these modes after creation. If you picked wrong, you have to delete the collection and create a new one. Decide intentionally up front.
Rule of thumb: if visitors will link directly to an entry (e.g., sharing a blog post URL), use hasPages = true. If entries are always displayed as part of another page, use false.
Step 1: Create the Collection
In your Pixelesq dashboard, click Collections in the sidebar, then click the create button. A dialog opens with two creation modes:
Manual - enter a name and start with an empty schema. You define fields yourself.
Create with AI (sparkles icon) - pick a collection type preset and describe your use case. AI generates a starter schema for you.
Manual Mode Fields
Name - the collection display name (e.g., "Blog Posts", "Team Members"). Minimum 2 characters.
Slug - URL-safe identifier, auto-generated from name (no spaces, no forward slashes).
Has Pages - the permanent decision described above.
AI Mode Additional Fields
Collection Type - pick from 11 presets: Blog Posts, Products/Services, Team Members, Testimonials, Case Studies, Events, FAQ, Features, Portfolio Items, Resources, Other.
Description - a short description of your specific use case. The more specific, the better the AI schema.
Click submit and the collection is created. In AI mode, Pixelesq redirects you to the schema editor with AI-generated fields ready to review.
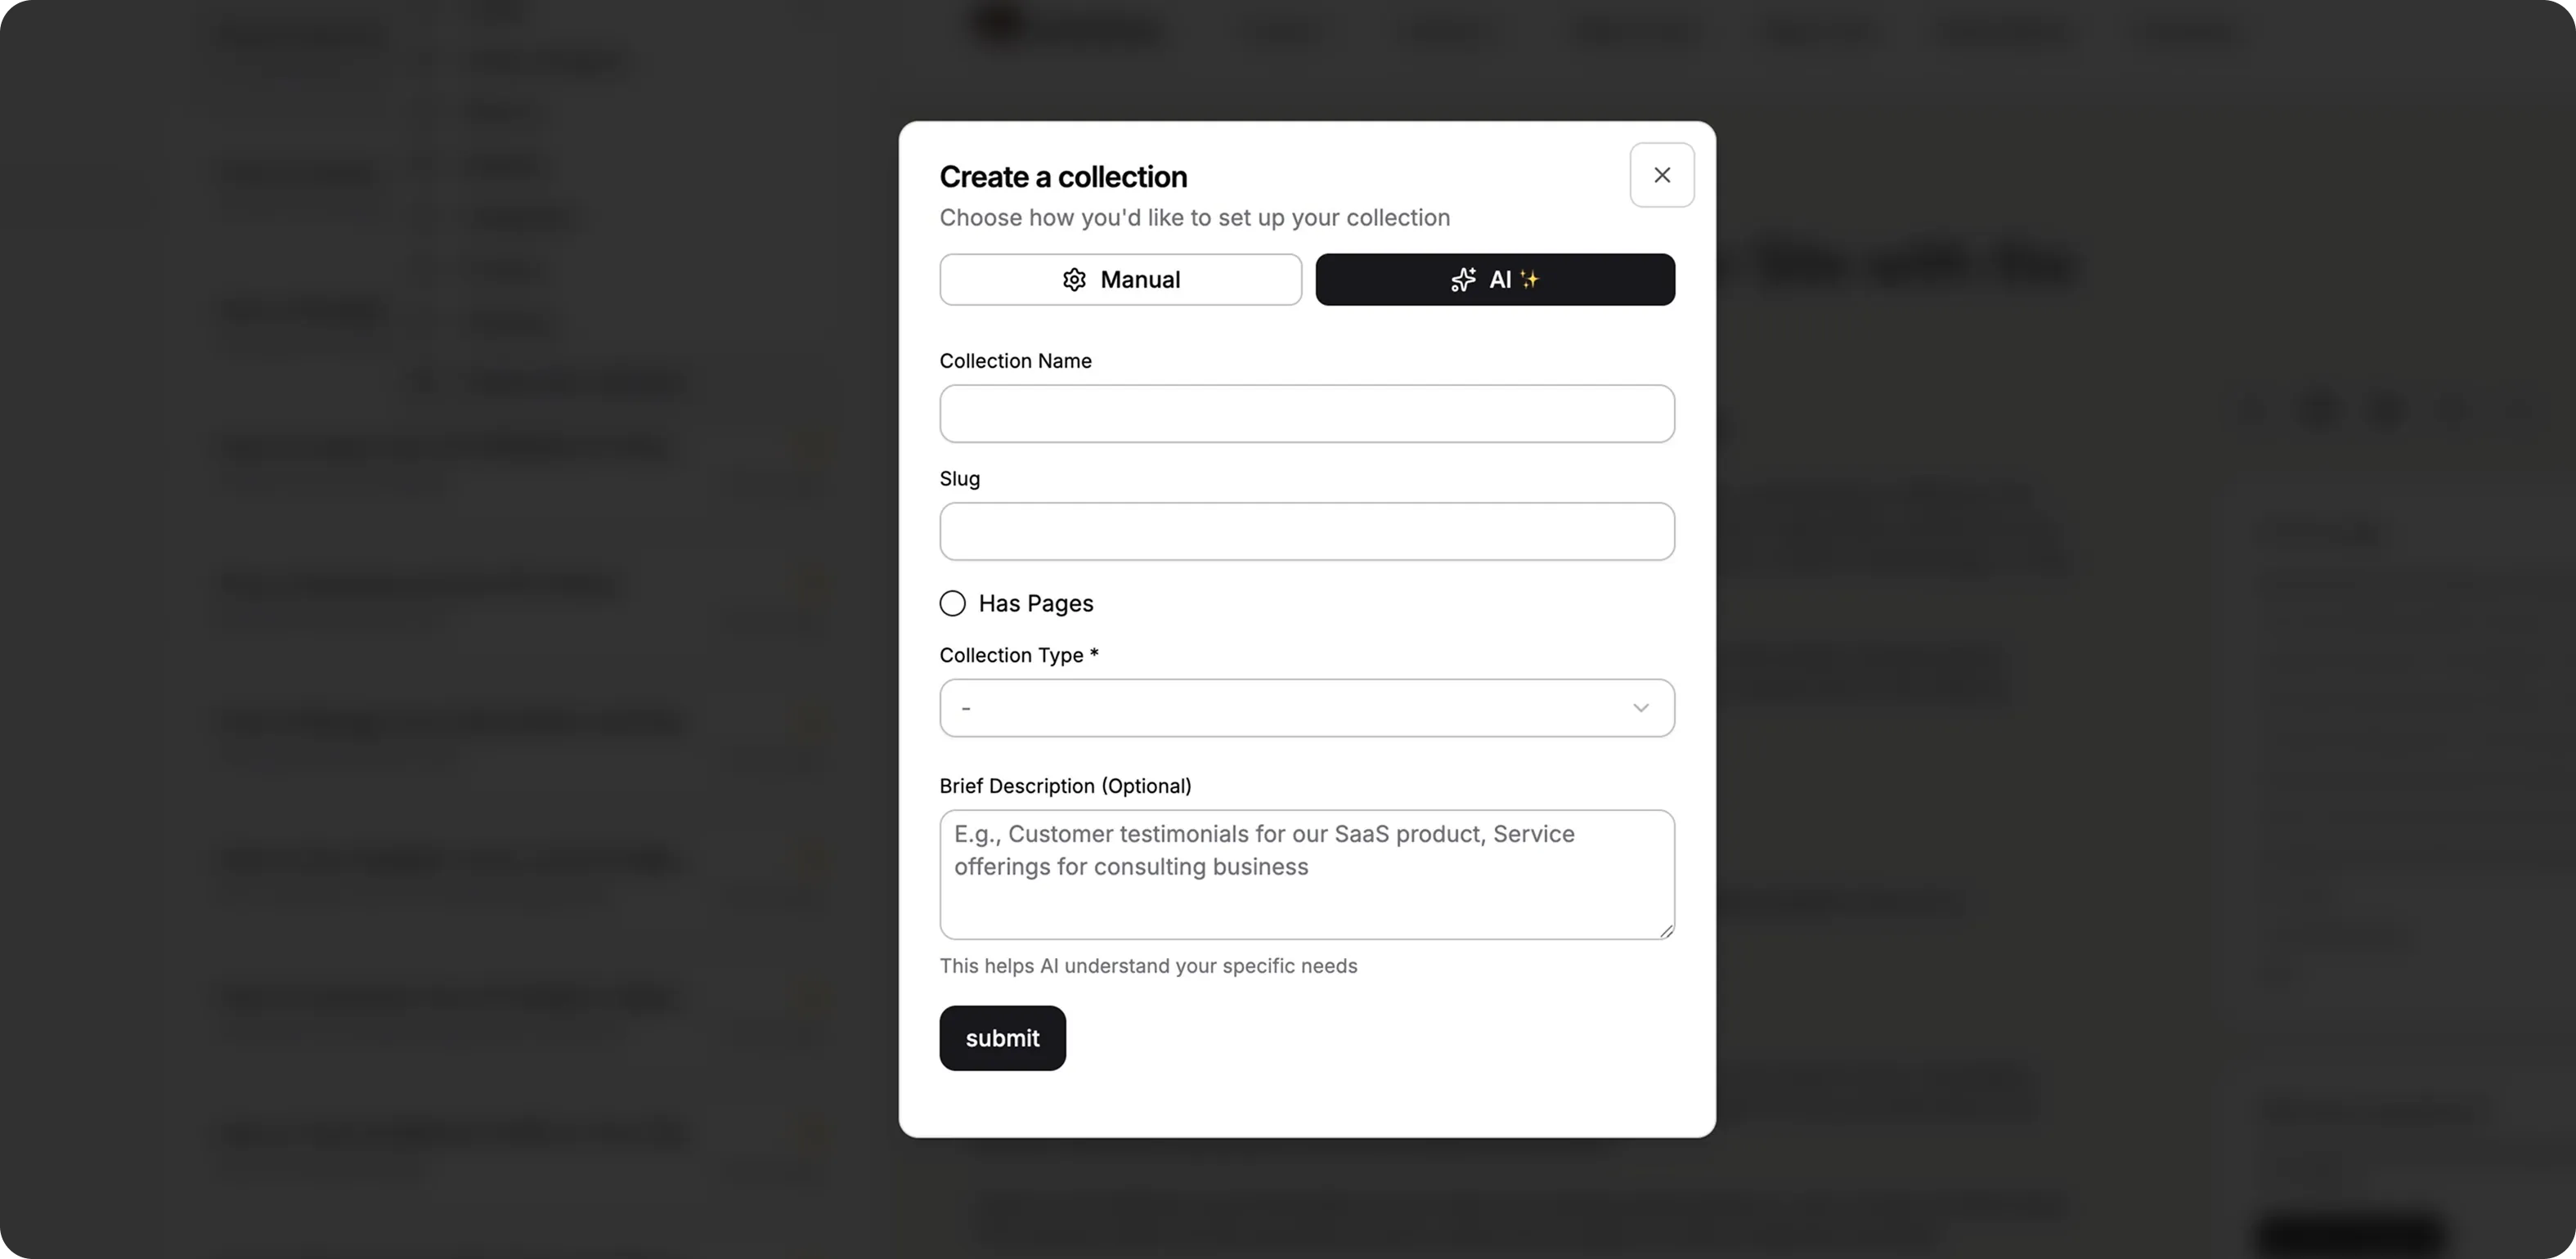
[Screenshot: Create Collection dialog with AI mode selected]
The 9 Field Types
Pixelesq supports nine field types. Pick the right one for each field based on the data it holds.
Text
Single-line text input. Use for titles, names, short labels, author names, URLs as plain strings, and any other short text.
HTML
Rich text editor with formatting (bold, italic, lists, links). Supports a safe subset of HTML tags: p, strong, em, ul, ol, li, a. Use for blog post bodies, long descriptions, and any formatted content.
Media
Image or file upload. Stores a URL to the uploaded asset in Pixelesq's asset library. Use for cover images, product photos, team avatars, logos, downloadable files.
Checkbox
Boolean toggle (true/false). Use for "featured" flags, "visible" toggles, "show author" settings, or any on/off preference.
Number
Numeric input. Use for prices, counts, ratings, quantities, ages, or any numeric value. Does not enforce min/max in the UI.
Date
Date and time picker. Stores ISO 8601 timestamps. Use for publication dates, event dates, expiry dates, deadlines.
Option
Single-select dropdown with predefined values. Use for categories, statuses, types, or any field with a fixed set of choices. Options are configured as a comma-separated list (e.g., "Draft, Published, Archived").
Reference
Foreign key to another collection. Use when an entry in one collection points to an entry in another. Example: a Blog Post collection with an "author" reference field pointing to a Team Members collection. Enforces relational integrity (you pick from actual entries, not type them as text).
Related
The reverse of reference. Use to show which entries in another collection point at this one. Example: on a Team Member entry, a Related field that shows all Blog Posts where this person is the author.
Step 2: Build Your Schema
After creating a collection, the schema editor opens. Click Add Field to create each field. For each field, set:
Label - what content creators see (e.g., "Cover Image")
Name - the internal field name (auto-generated in snake_case, editable)
Type - one of the 9 types
Required - whether the field must be filled in to save an entry
Help Text - instructions shown to content creators and used by AI agents when generating content
Options - comma-separated values (only for option type)
To - target collection (only for reference type)
Drag the handles on the left to reorder fields. The order here controls the order fields appear in the entry edit form. Group related fields together for a better editing experience.
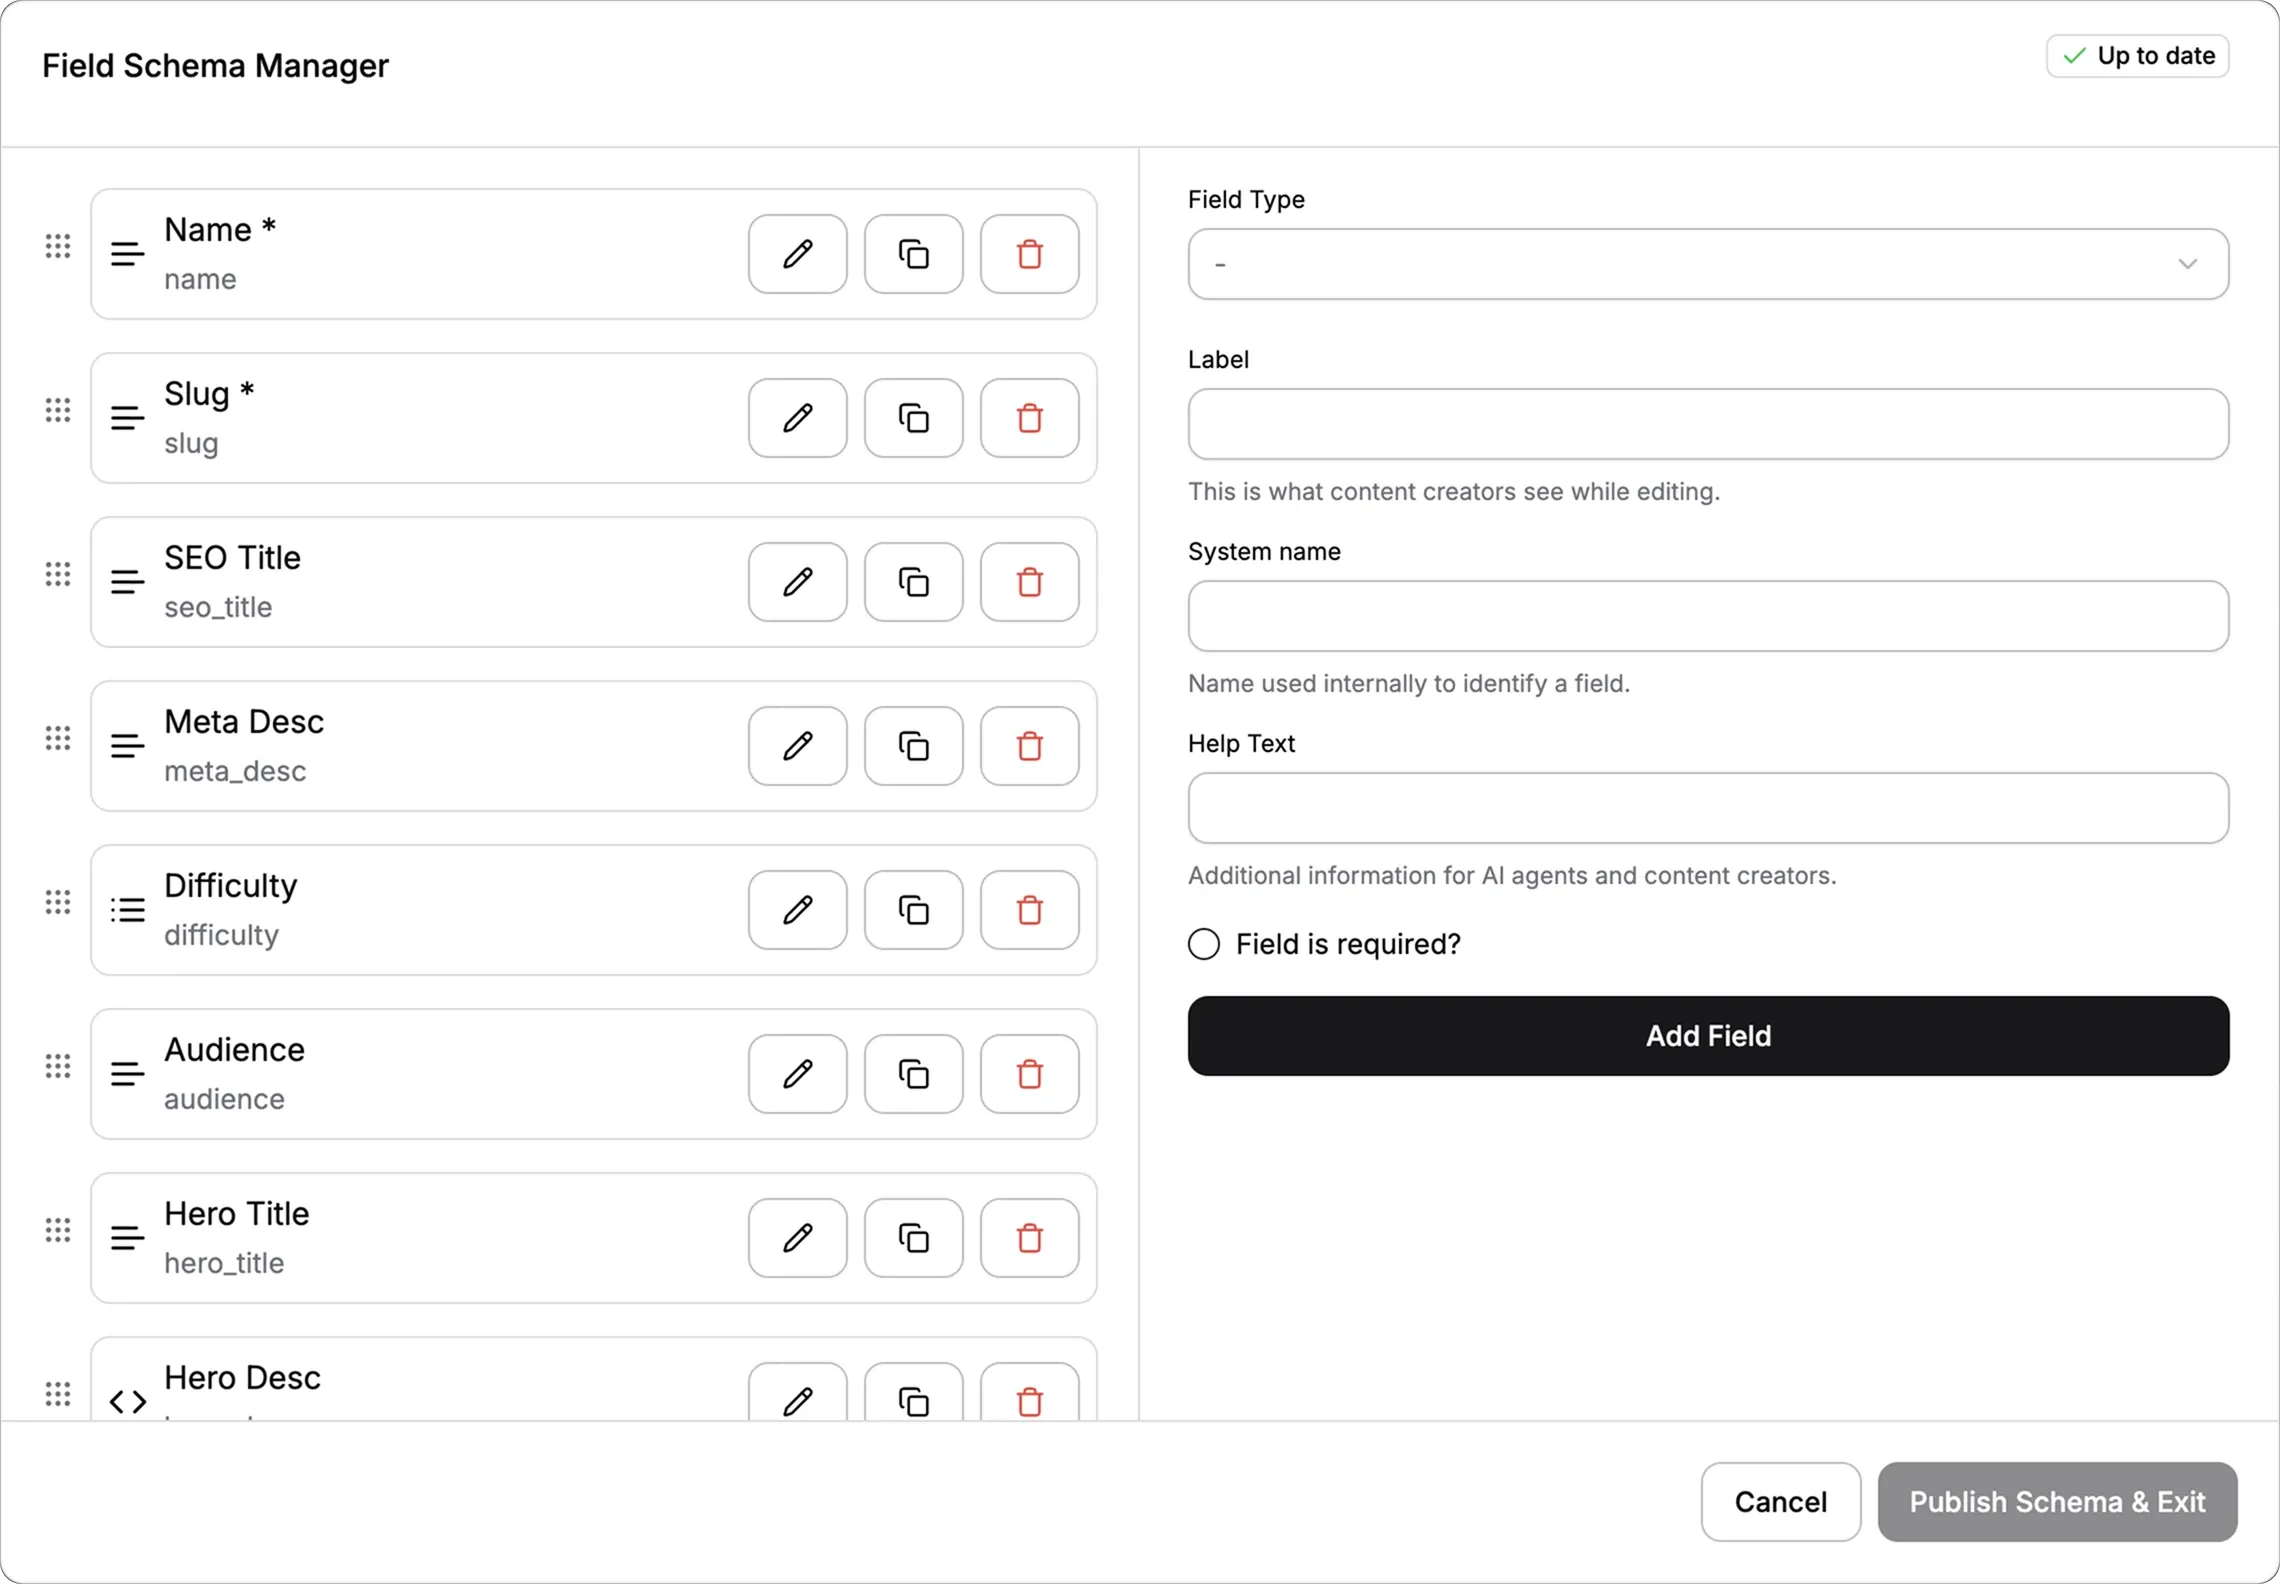
[Screenshot: Schema builder with fields listed and a field being edited]
Step 3: Save Your Schema
After adding or editing fields, click Publish Schema & Exit. This saves the schema to the server and makes it available for new entries.
A status badge at the top shows whether your schema is up to date (green check) or has pending changes (yellow arrow). The publish button is disabled if no changes have been made.
Help Text Is Critical
The Help Text field seems optional but it is the single most important thing you can add. It serves three purposes:
Guidance for content creators. When someone fills in an entry form, help text appears below each field telling them what to write.
Input for AI content generation. When the Pixel Agent generates entry content, it reads help text to understand what each field should contain. Good help text makes AI-generated content dramatically better.
Validation hints. Include character counts, format requirements, or examples (e.g., "Cover image URL, 1200x630 recommended").
Never leave help text blank for important fields. "Title of the blog post" takes 5 seconds to write and saves hours of bad content.
Reference Fields: Linking Collections
Reference fields let you build relationships between collections. Example setup for a blog:
Team Members collection: name, role, bio, photo
Blog Posts collection: title, content, cover, author (reference to Team Members)
When creating a blog post, the Author field becomes a dropdown showing all team members. You pick one, and the blog post is linked to that member. On the public blog page, you can display the team member's name, role, and photo using the reference.
References cannot be circular. If A references B, then B cannot reference A. Pixelesq prevents this at creation time.
What Happens When You Delete a Field
This is important. Deleting a field from your schema also deletes that field's data from every existing entry in the collection. There is no undo, no warning beyond the confirmation dialog, and no way to recover the content.
Before deleting a field:
Export your entry data if you might need it later
Confirm no templates or pages reference the field
Consider renaming the field instead (less destructive)
Adding a new field is safe. Existing entries just have that field empty until someone fills it in.
Pro Tips
Start with AI mode even if you plan to customize heavily. The AI gives you 8-15 fields matched to your collection type in one click. Editing them is 10x faster than building from scratch.
Name fields clearly at creation. Renaming a field later breaks any template connections that reference the old name. Pick the name you want to live with.
Use references instead of duplicating data. If you have a "Team" field on blog posts, use a reference to your Team Members collection instead of typing names. Single source of truth, updates propagate automatically.
Fill in help text immediately. Go back and add it later and you will never do it. Do it while you create the field and your future content creators and AI agents will thank you.
Keep schemas simple. A schema with 30 fields is almost always too complex. Split into multiple collections or move rarely-used fields into an HTML or JSON field instead.
Troubleshooting
"Slug already exists" error when creating a collection: Another collection in the same project already uses that slug. Pick a different slug. Slugs must be unique per project.
AI-generated schema has too many or too few fields: The AI generates based on your description. A vague description gets a generic schema. Try again with a more specific description, or edit the schema manually after generation.
I cannot find the hasPages option after creation: hasPages is set at creation time only. There is no toggle to change it later. If you picked wrong, create a new collection with the opposite setting and migrate your entries.
Reference field dropdown is empty: The referenced collection has no entries yet. Create at least one entry in that collection first, then the reference dropdown will populate.
Reordering fields does not save: Drag-to-reorder updates the local state. You must click Publish Schema & Exit to save the new order to the server. The yellow "Pending Changes" badge indicates unsaved changes.
FAQ
Can I have two fields with the same type in one collection?
Yes. You can have multiple text fields, multiple media fields, multiple of any type. Only field names must be unique within a collection, not types. For example, a Team Members collection might have a "photo" media field and a "cover_image" media field for different use cases.
Is there a limit to how many fields a collection can have?
There is no hard limit on field count, but schemas with more than 15-20 fields become difficult to edit and slow to render. For complex data, split into multiple collections linked by references. For a few rarely-used metadata fields, consider storing them as JSON in a single HTML or text field.
How do I add validation rules like max character count or regex patterns?
Pixelesq does not currently support per-field validation beyond the "required" flag. For character limits or format enforcement, use help text to communicate the requirement to content creators (e.g., "Maximum 60 characters"). AI agents will follow these constraints when generating content. For strict validation, manual review is currently the only option.
Can I import entries from a CSV or spreadsheet when creating a collection?
Not via CSV directly. Pixelesq supports bulk entry creation through a JSON file upload (Bulk Create feature in the entry list view). Convert your CSV to JSON matching your collection schema, and upload it. Each entry must include $pq_name and $pq_slug special fields plus your schema fields.
What happens to entries if I rename a field in the schema?
Renaming a field updates the schema but preserves the underlying data. However, any template connections that reference the old field name will break until updated. If your template has ctx.title.value: <%=old_name%> and you rename old_name to new_name, update the template connection to match.
Can a collection have multiple view templates for different entries?
Not directly. Each collection with hasPages = true uses a single view template for all its entries. If you need different layouts for different entry types (e.g., "Featured" posts look different from regular posts), add a checkbox or option field to the entry, and use that field in the template to conditionally render different sections. Or split into two collections.


